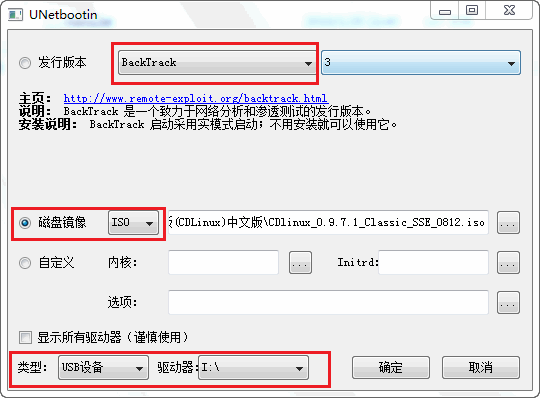
CDlinux is a highly flexible and customizable system. You can use it as a powerful system repair and maintenance tool; you can also add the software you need to expand it into a comprehensive desktop operating system; or you can remove the features you don’t need and trim CDlinux into an embedded system. You can completely customize your own CDlinux according to your needs. cdlinux wireless cracking tutorial Preparation tools 1. One USB flash drive with a minimum of 1GB space. It needs to be formatted, so remember to save the internal files in advance. 2. CDlinux image, which is 135MB in size. 1. CDlinux USB boot In this step, I spent a lot of effort because CDlinux does not support cracking in a virtual machine with a built-in network card. If you have an external network card on your machine, I will provide a method later on how to operate it. After testing various methods such as grub, I found that the following method is more suitable for everyone, and the tool used for making is particularly small and portable. Its feature is to install CDlinux on a USB flash drive. Run the Unetbootin program. Set it as shown in the figure below:
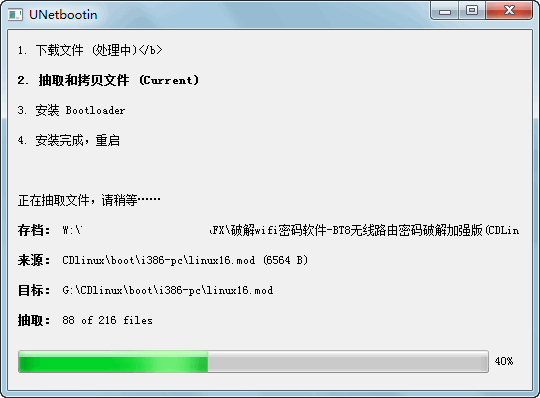
Choose BackTrack as the distribution version, which is suitable for our CDlinux environment. Then choose the downloaded CDlinux image, and finally select the drive letter of our USB flash drive. Remember not to select the wrong one! Click OK, and the program will start making automatically. We only need to wait!
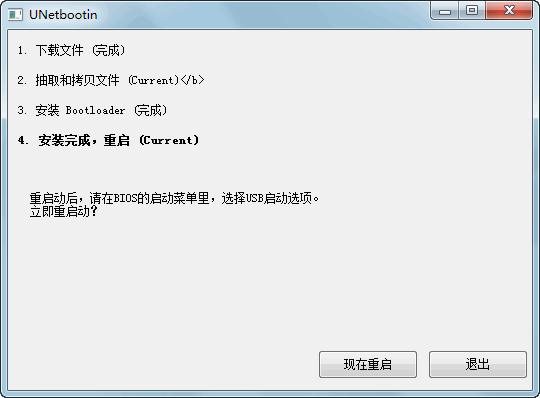
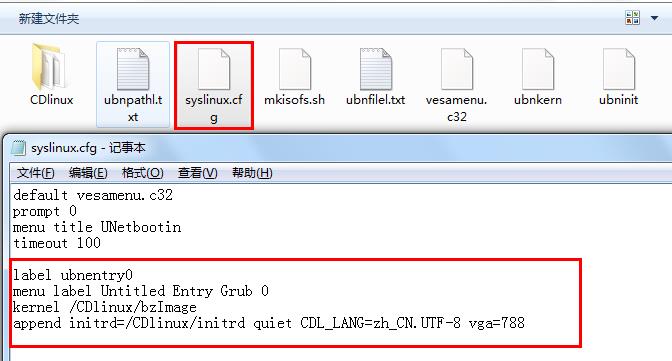
After the creation is completed, it will prompt for a restart, but here we click Exit. Do not restart for now. 2. Chinese language setting This point troubled me when I started up because the source image is multilingual. After completing the previous steps, it automatically entered English and skipped the selection. So we need to set it up. The setting method is very simple. Open the USB flash drive that we just made, find the syslinux.cfg file in the figure below, open it with Notepad, and delete the original code and replace it with the code in the red box. The file will be provided for download as an attachment, so you can directly replace it!
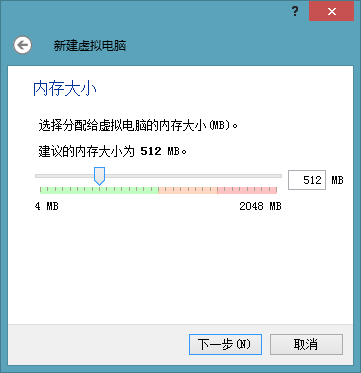
For friends without an external network card, please skip this step directly. Now let me explain how to install the image without making a USB flash drive: First, we need a virtual machine, here I will use VirtualBox as an example (click here to download), it is less than 100MB, multilingual, free, open-source, no need to crack, and the attachment will be provided, so don’t worry! After installation (although the installation interface is in English), click the “New” button in the upper left corner, then select “Type” and choose Linux, the name can be anything, no need to change anything else. Click Next, the default 512 is enough, continue to the next step.
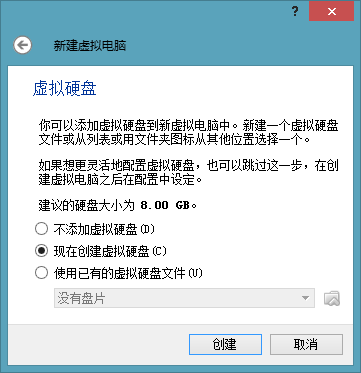
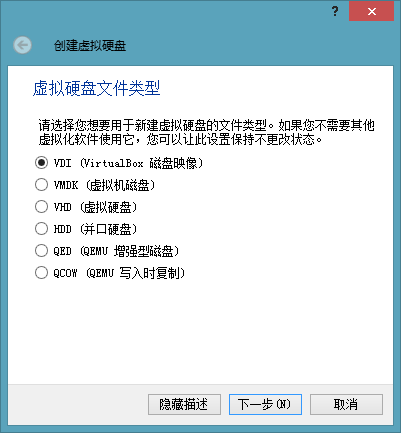
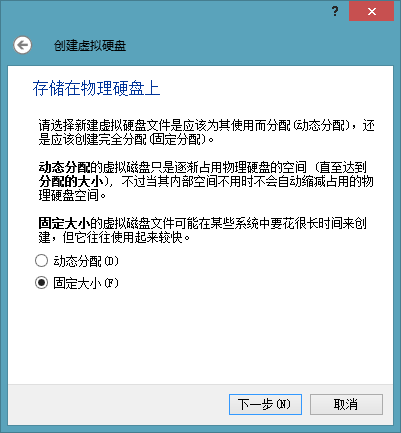
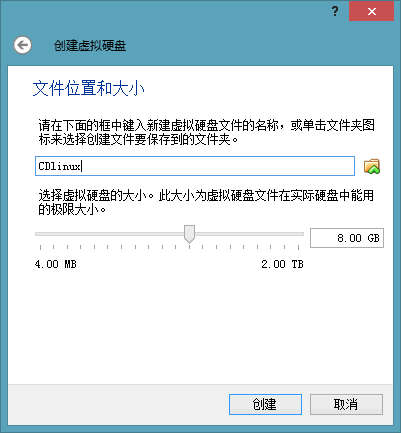
For the first time, create a virtual hard disk with the default settings. Choose the VDI type by default. If it is on a physical hard disk, it is recommended to choose “Fixed size”. The next step is to select the location where we created the VDI file. The default is to store it in the virtual machine installation location, but we need to change it, so click the folder icon to change it.


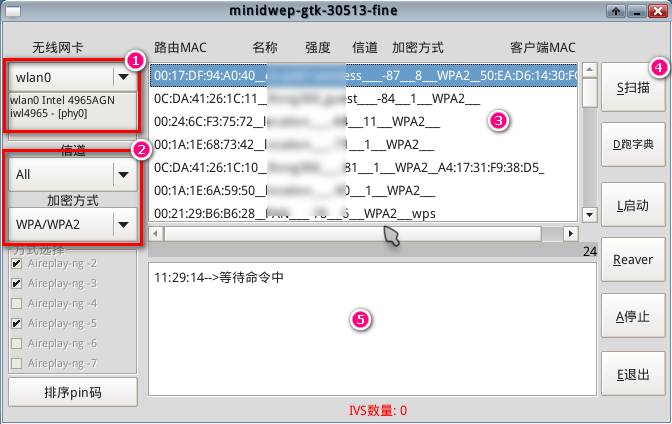
Click Create, and the virtual disk will start to be created. Wait a few minutes, and the CDlinux we created will appear. Click “Settings” in the upper left corner. Select “Storage” on the left, and choose the image file provided by this post in the controller. Then click OK and go back to the main interface to start. Everyone understands the above instructions! Do not use it for illegal purposes… Now let’s introduce the main interface of this tool:
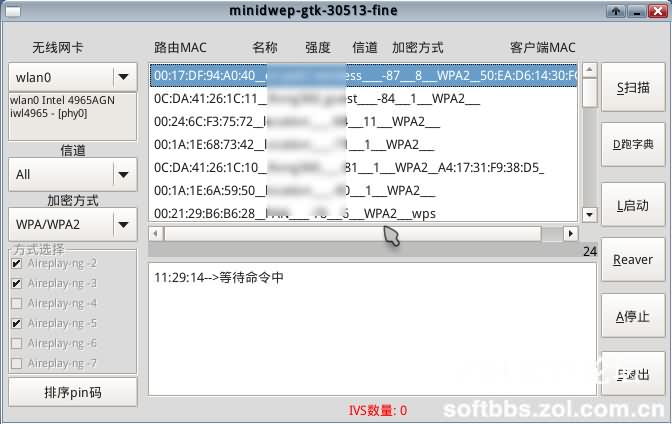
1) Wireless network card wlan0. It displays your own wireless network card information. 2) Channel and encryption method. The channel is set to All by default, and the encryption method is divided into WEP and WPA/WPA2. Choose the default for the method below. 3) Display the MAC address, name, strength, channel, encryption method, etc. of the router. 4) These vertical bars are functional buttons. Click to implement related functions. 5) The progress of relevant status is displayed when scanning. After seeing the interface, just click the scan button in Figure 4, and you will see the progress bar in the middle moving again. Wait a moment, and you will see the MAC address, name, strength, channel, encryption method, etc. of the router. Here, I will take WPA/WPA2 as an example for the encryption method. I will explain WEP later (because it is easier to crack).
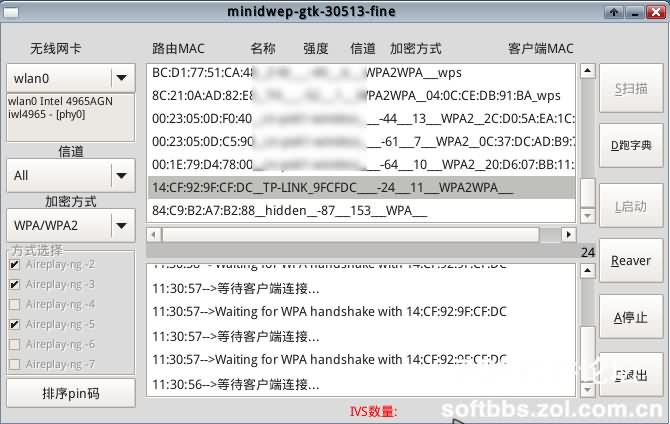
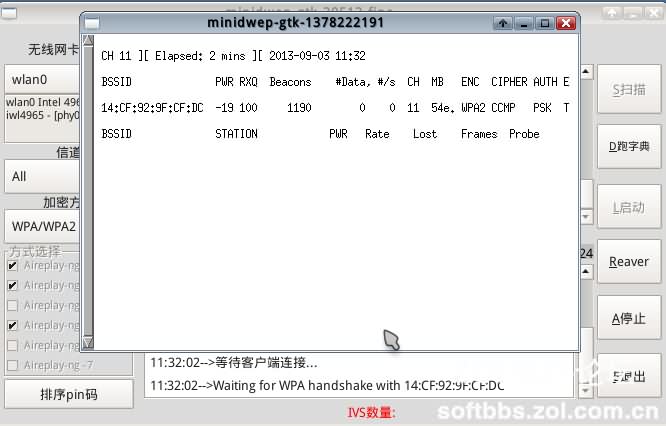
Click the name of the router you want to crack, click Start on the right, and the handshake operation will start. It will keep connecting to the router automatically. The duration of this process depends on the router and the strength of the signal. When the handshake is successful, you will see the relevant prompt. When you see the figure below, it means that we are one step closer to success.
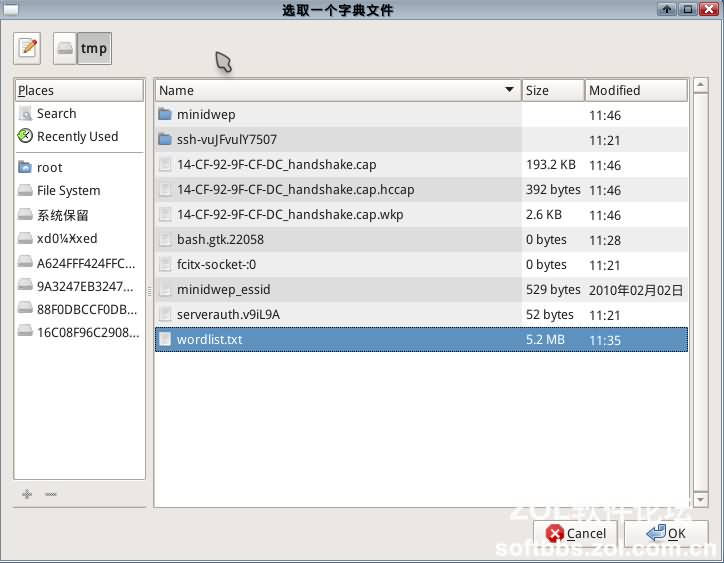
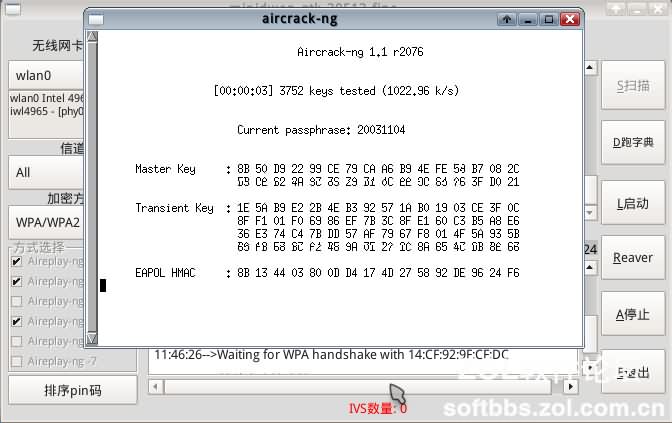
Wait a moment, and it will prompt that the handshake packet has been obtained. It will ask if we want to choose a dictionary to search for the password. Click “Yes” and then click “OK”. Select the “wordlist.txt” in the pop-up window. This is included in the image. Select it and click “OK”. Then the password cracking process begins. This depends on luck and the strength of the dictionary. Some people have shared password packages of 3GB in size. At this speed, you can get results in about the time it takes to have a meal, unless the password is particularly complicated!
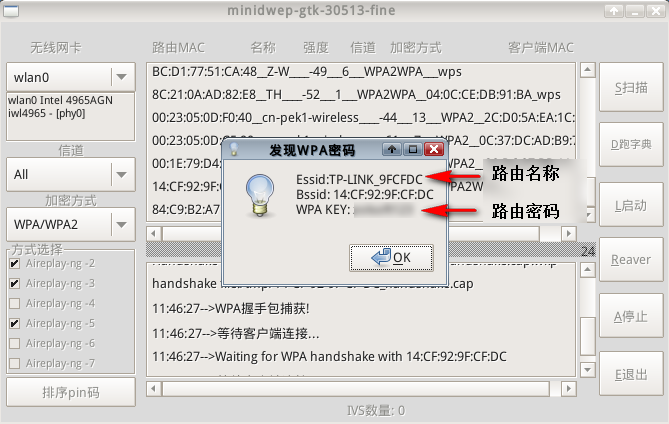

This time, luck is relatively good. When the software automatically scans the password, it will pop up. I really appreciate this! It’s so user-friendly! The pop-up window displays the detailed router name (SSID) and password information. Record the cracked password, and then the software will prompt whether to save the handshake information packet to the hard disk partition.
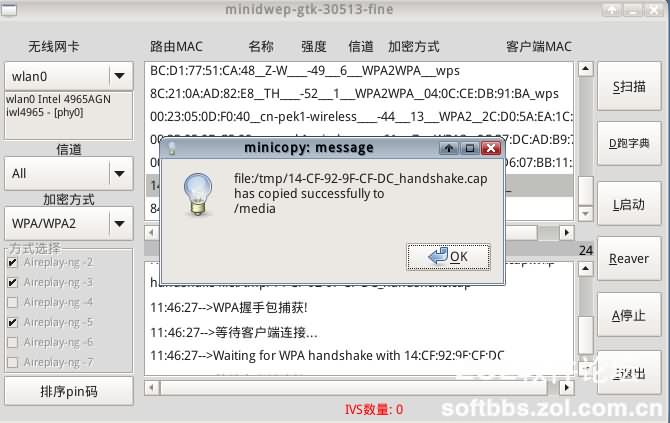
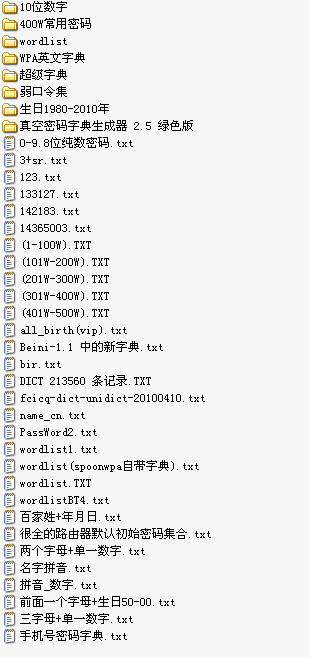
After selecting the save path, you can save it. In this way, the password for a router is cracked. This seems to be a simple tutorial with detailed pictures and text, but it took a lot of effort. I tried many methods for CDlinux USB boot and formatted the USB flash drive several times before choosing this method, which is a clever and convenient solution. I hope everyone can successfully crack the router password they want to crack! This is the end of the detailed tutorial on cracking WiFi passwords with pictures and text. I hope you can understand it! If there are any new things in the future, they will be updated irregularly in this post. Come and take a look when you have time. Maybe there will be some surprises! There are two defense methods against this type of cracking: using special symbols and binding with MAC addresses! However, it seems that there are fewer settings like this around me, so the success rate is still high for everyone! Good luck 🙂 Regarding the methods in the post, some friends replied that they are somewhat complicated. In fact, most of them can skip the step of using a virtual machine and directly use a USB flash drive, which is also very good. Updated on September 5th: Windows cracking method: Thanks to the village chief for submitting the ZOL homepage focus picture recommendation. Some netizens replied that this method is relatively shallow and not deep enough, and the speed may be slower compared to GPU cracking. So I will introduce a tool that can be used to crack with GPU under Windows: Elcomsoft Wireless Security Auditor (referred to as EWSA, the attachment provides a special version for download, you know). The version provided here is modified to disable pop-up ads (you know that kind of version). Because it belongs to hacker tools, antivirus software may detect it, so please decide whether to use it yourself! The software has added a Chinese language pack, which can be selected through the following figure: Options-Language-zh-CN. The rest is in Chinese, which I think most people can understand. However, it requires the handshake package we saved above, so just import it! (Under CDlinux, the method of saving the handshake package is to upload it to a cloud drive. The image comes with Firefox browser. Log in to the cloud drive and upload it. Download it back to a Windows computer and use this software to run it.) Because the powerful computing power of the GPU is really incomparable to the CPU, SO for those who are impatient, choose to run it under Windows (don’t stop under CDlinux, it will be faster this way). Updated on September 7th: A more powerful dictionary package:
 量子哈希
量子哈希


